
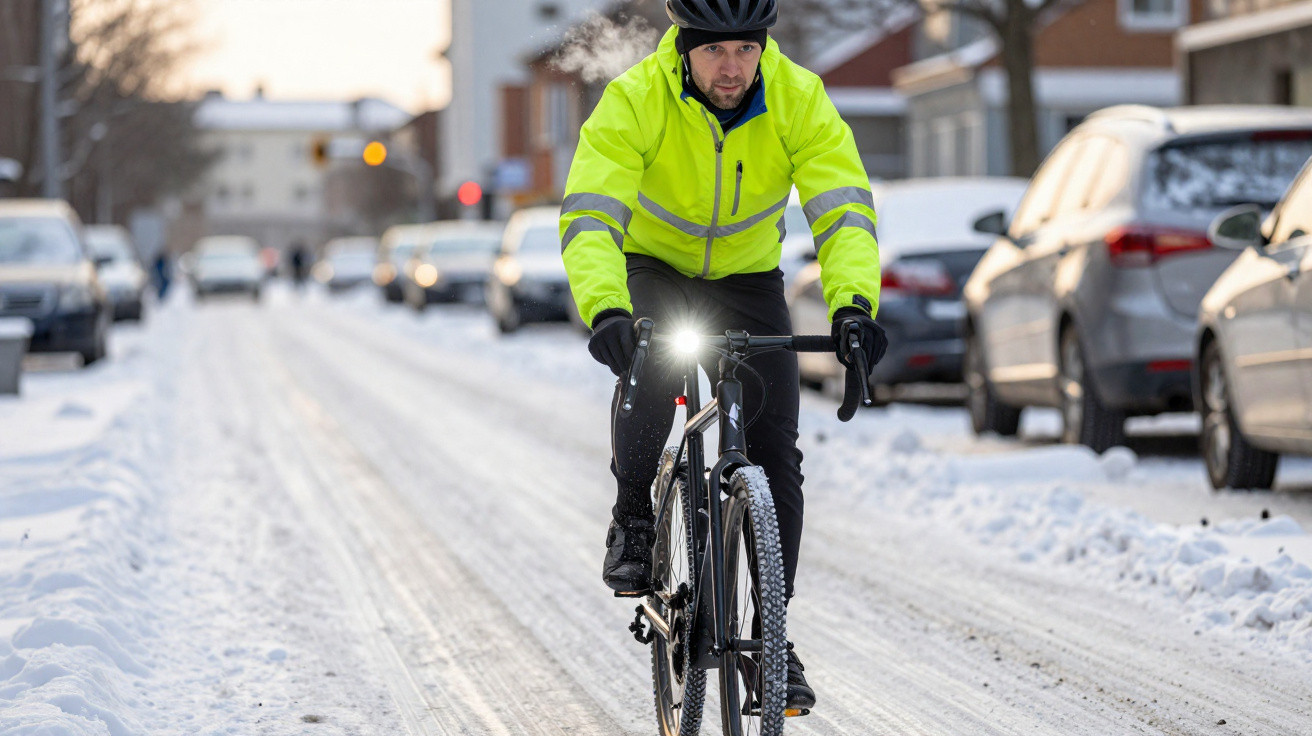
A few straightforward tweaks can reduce the risk considerably.
Plenty of people give up cycling in winter out of sheer frustration, convinced every trip will end in a skid and a fall. It doesn’t have to be that way. If you adjust your clothing, your bike and the way you ride, you can still get where you’re going relatively calmly in snow, slush and black ice – no heroics, no pro-level kit, just a sensible approach.
Dress warmly, but stay mobile
If you’re cold, you tense up – and when you ride tense, your reactions suffer. That’s why safer winter cycling starts indoors, before you even touch the bike.
Your head loses heat fastest. Thin, close-fitting beanies or skull caps usually fit neatly under a helmet. Chunky bobble hats may feel cosy, but they often sit poorly beneath a helmet and can restrict your field of view.
For your face and neck, a short scarf, a snood or a fleece or wool neck warmer works well. It keeps you warm without loose ends that whip about in the wind or could snag on the handlebars.
Your hands are just as critical. If your fingers go numb, you can’t brake or change gear reliably. Purpose-made winter cycling gloves typically offer:
- insulating material to keep out the cold
- enough finger dexterity to brake and shift properly
- grippy palms for secure contact with brake levers and handlebars
In very cold areas, “pogies” or handlebar mitts are another option. They fit over the grips and act like small neoprene caves for your hands.
On your upper body, layering is the proven method: a wicking base layer, a light insulating layer, then a windproof and water-repellent jacket. Cotton quickly soaks up sweat and then chills; synthetics or merino wool keep you warmer.
If your legs get cold easily, pull on overtrousers made from rainwear fabric or softshell. They block the cold and also protect against spray and mud.
Feet and toes are an often-overlooked weak point. Thick wool socks paired with reasonably waterproof shoes – or overshoes – help ensure you’re not walking home on an “ice block” by the end of the ride.
The less you’re shivering, the more relaxed you’ll sit on the bike – and relaxed riders respond more safely.
Set your bicycle up for winter
Before heading onto slippery paths, give your bike a small winter tune-up. One key detail is saddle height. If you lower the seatpost slightly, your centre of gravity sits closer to the ground. That makes it easier to put a foot down in an emergency and catch a slide.
Put heavy bags on the rear rack rather than on your back. A rucksack shifts weight upwards and can make the bike feel more tippy. Panniers keep the weight low, which steadies the handling.
Salt and slush behave like sandpaper on the drivetrain and brakes. A well-maintained chain with fresh oil or a dedicated winter lubricant not only runs more smoothly, it also wears more slowly and shifts more reliably.
A useful trick is to lower tyre pressure slightly. Letting out a little air increases the tyre’s contact patch, which boosts grip – particularly on slushy snow and compacted snow.
In places with harsher winters, swapping tyres can be worthwhile. Chunky tread tyres or even specialist winter tyres with studs provide noticeably more traction on icy surfaces. They do roll more heavily, but they pay off the first time you hit an unexpected patch of black ice.
| Measure | Winter benefit |
|---|---|
| Lower the saddle slightly | Easier to brace, reduced tipping risk |
| Reduce tyre pressure a little | Larger contact patch, more grip |
| Chunky tread or studded tyres | More secure riding on snow and ice |
| Panniers instead of a rucksack | Lower, more stable centre of gravity; less wobble |
Riding technique on slippery roads: stay calm
On ice and snow, any sudden movement is twice as risky. If you want to arrive safely, allow extra time and slow down significantly. Take corners with almost exaggerated gentleness: scrub off speed early, keep the bike more upright, and roll through smoothly.
Braking is the trickiest part. Use both brakes, but apply most of the pressure to the rear brake. If the front wheel locks, it almost always means an immediate forward fall.
Never brake with the front only – on slippery roads that’s the quickest route to the ground.
Ideally, slow down with light, steady braking over a longer distance instead of short, hard grabs. If you scan ahead for junctions and potential hazards early, you’re less likely to snatch at the brakes in panic.
Road markings and metal surfaces need special care: zebra crossings, arrows, drain covers, rails or manhole covers can turn into mini slipways in winter. When in doubt, cross them slowly and as straight as possible – or get off and push.
Be clearly visible in the darker months
Winter often brings darkness, fog and snowfall. Many crashes happen because drivers simply notice cyclists too late. That’s why visibility belongs in your safety kit just as much as a helmet and effective brakes.
Reflective outerwear – or even a basic high-vis vest – is more powerful than many people expect. Yellow or neon green panels with reflective strips stand out immediately in headlights. If you’re visible from a distance, you’re usually overtaken earlier and given more space.
On the bike itself, front and rear lights are essential. Bright LED lights powered by rechargeable batteries or disposables help ensure you’re not only seen, but also able to spot potholes, ice patches and piled-up snow in time. Reflectors on spokes and pedals add moving points of light that drivers pick up faster.
- Front light: white, ideally with a wide beam
- Rear light: red, steady or flashing (where permitted)
- Reflective strips on the frame, helmet and bags
If you ride in town regularly, you can add self-adhesive reflective stickers to your helmet or jacket. They weigh nothing, but can make a big difference in traffic.
Daily care: winter eats away at components
Salt, mud and moisture are hard on any bicycle. Cheaper commuter bikes in particular can start rusting quickly in winter if they’re neglected. A short care routine after each ride is often enough.
Ideally, store the bike somewhere dry, rinse off heavy grime with warm water, then dry it with a cloth. The chain, cassette, derailleur and brakes don’t cope well with constant salty water. Wiping them down regularly and adding a light coat of oil significantly extends their lifespan.
E-bikes have one extra consideration: the battery. Cold weather noticeably reduces range. If you leave the bike outside, protect the battery with a neoprene cover or take it indoors. Charging at room temperature is also gentler.
When is it better to get off?
You can improve a lot – but winter cycling is never completely risk-free. In some situations, the safest advice is simply to dismount and push. For example, on mirror-smooth ice, on freezing wet patches on bridges, or where wet snow has built up into thick, heavy slush.
Cycling in winter has clear advantages: fresh-air exercise, no waiting for packed buses, and predictable journey times even when traffic is gridlocked. If you prepare properly, adapt your kit and bike, and adjust how you ride, you can enjoy those benefits without taking reckless chances.
Beginners are best off easing in: start by testing short rides, choose quieter routes with less traffic, and pay attention to what still feels uncertain. With each trip you’ll build a better sense of grip, braking distance and speed – and that icy morning stretch becomes a little less intimidating.



Comments
No comments yet. Be the first to comment!
Leave a Comment